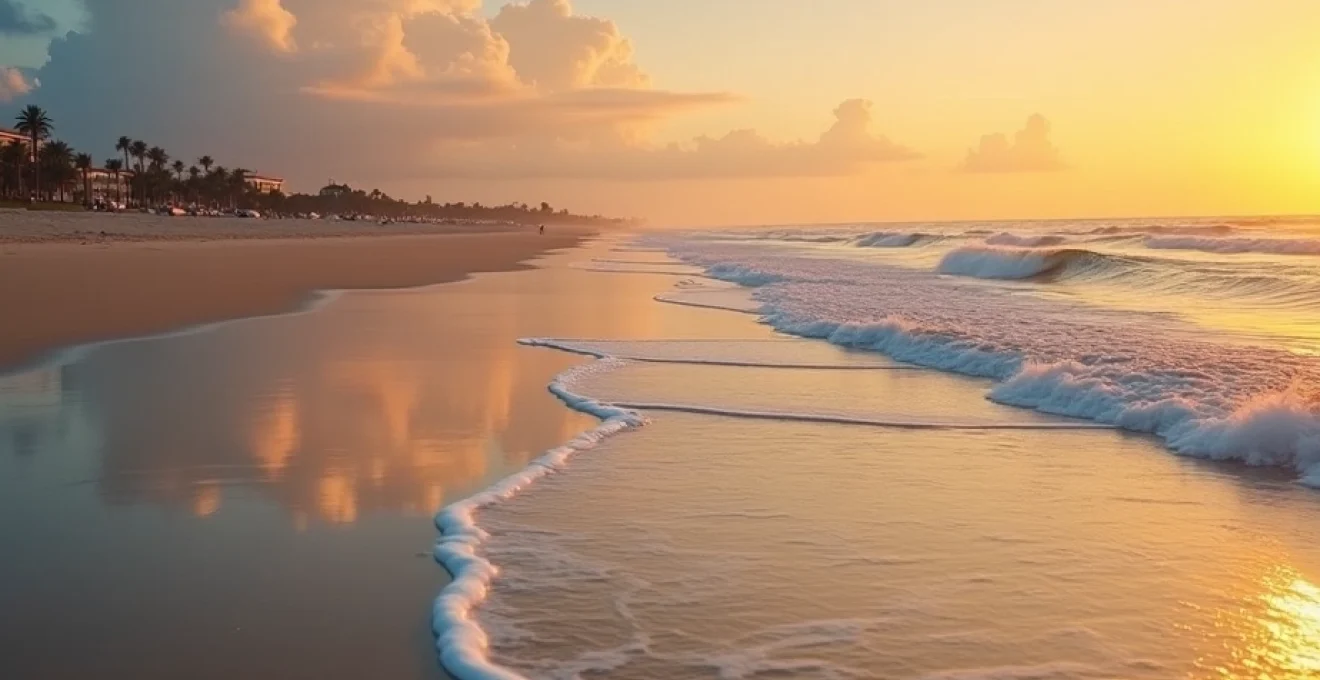
Capturing the essence of a beach scene through photography is an art form that combines technical skill with creative vision. The interplay of light, water, and sand presents unique challenges and opportunities for photographers of all levels. From the golden hues of sunrise to the dramatic silhouettes at sunset, beaches offer a dynamic canvas for creating stunning images. This comprehensive guide will equip you with the knowledge and techniques needed to elevate your coastal photography, ensuring your beach shots stand out from the crowd.
Mastering camera settings for coastal lighting conditions
Understanding how to manipulate your camera settings is crucial for achieving optimal results in the varied lighting conditions found at the beach. The bright, reflective environment requires careful consideration of exposure parameters to capture the scene accurately.
Optimal aperture selection for beach scenes
Choosing the right aperture is essential for beach photography. For landscapes with expansive depth, a smaller aperture (higher f-number) like f/11 or f/16 ensures sharp focus from foreground to background. This technique is particularly effective when capturing rocky shorelines or distant islands. Conversely, a wider aperture (lower f-number) such as f/2.8 or f/4 can create a dreamy, bokeh effect for portraits or close-ups of beach details.
Shutter speed techniques for capturing wave motion
The movement of waves offers an opportunity to create dynamic images. Fast shutter speeds (1/500s or faster) freeze the action, capturing the intricate details of splashing water. For a more ethereal effect, slow shutter speeds (1/15s to several seconds) can transform crashing waves into a silky mist. Experimenting with different shutter speeds allows you to convey various moods and textures in your beach photographs.
ISO management in bright seaside environments
In the bright coastal environment, keeping your ISO low (100-200) is generally advisable to minimize noise and maintain image quality. However, in low-light situations such as sunrise or sunset shoots, you might need to increase the ISO to maintain a fast enough shutter speed. Modern cameras handle higher ISOs well, so don’t hesitate to push it up when necessary to capture that perfect golden hour shot.
RAW vs JPEG: choosing the right format for beach photography
Shooting in RAW format is highly recommended for beach photography. RAW files retain more information, allowing for greater flexibility in post-processing, especially when dealing with high-contrast scenes common in coastal environments. This format enables you to recover details in highlights and shadows that might be lost in JPEG compression. While JPEGs are more convenient for immediate sharing, the editing potential of RAW files can be the difference between a good photo and a great one.
Composition strategies for stunning shoreline shots
Effective composition is the cornerstone of captivating beach photography. By thoughtfully arranging elements within your frame, you can create images that draw the viewer’s eye and evoke emotion. Let’s explore some key compositional techniques that will elevate your coastal captures.
Implementing the rule of thirds in seascape framing
The rule of thirds is a fundamental principle in photography that can significantly enhance your beach shots. Imagine your frame divided into a 3×3 grid; placing key elements along these lines or at their intersections creates a balanced and visually appealing composition. For seascapes, try aligning the horizon with the upper or lower third line, depending on whether you want to emphasize the sky or the water. This technique adds dynamism to your images and prevents the horizon from bisecting the frame awkwardly.
Utilizing leading lines with piers and coastlines
Leading lines are powerful compositional tools that guide the viewer’s eye through the image. At the beach, natural and man-made elements provide abundant opportunities for creating these visual pathways. A pier stretching into the sea, the curve of a shoreline, or patterns in the sand can all serve as leading lines. Position these elements to draw attention to your main subject or to create a sense of depth and perspective in your coastal landscapes.
Incorporating foreground elements for depth in beach photos
Adding foreground interest is a technique that can transform a flat beach scene into a multi-dimensional photograph. Look for interesting rocks, shells, or driftwood to include in the foreground of your composition. These elements not only add depth to your image but also provide a sense of scale and context. By carefully positioning foreground objects, you create layers within your photograph, inviting the viewer to explore the scene from front to back.
Remember, the most compelling beach photographs often tell a story or evoke a feeling. Use compositional techniques to guide your viewer through that narrative.
Essential gear for Professional-Quality beach photography
Having the right equipment can make a significant difference in the quality and variety of beach photos you can capture. While skill and creativity are paramount, certain gear can help you overcome the challenges of coastal environments and expand your photographic possibilities.
Selecting Weather-Sealed camera bodies for coastal conditions
The beach environment can be harsh on camera equipment. Salt spray, sand, and moisture can damage sensitive electronics. Investing in a weather-sealed camera body provides crucial protection against these elements. Look for cameras with robust build quality and environmental sealing. While no camera is completely waterproof without additional housing, weather-sealed bodies offer a level of protection that allows you to shoot confidently in coastal conditions.
Must-have lenses for versatile beach shooting
A versatile lens kit is essential for capturing the diverse scenes you’ll encounter at the beach. Consider including the following in your gear bag:
- Wide-angle lens (16-35mm): Ideal for expansive seascapes and dramatic skies
- Standard zoom (24-70mm): Versatile for both landscapes and environmental portraits
- Telephoto lens (70-200mm): Perfect for capturing distant subjects and compressing perspective
- Macro lens: For close-up shots of beach textures and marine life
Each lens type offers unique creative possibilities, allowing you to adapt to various shooting scenarios you might encounter during your beach photography sessions.
Polarizing and neutral density filters for enhanced seascapes
Filters are indispensable tools for beach photography. A circular polarizing filter ( CPL ) can reduce glare on water surfaces, enhance the blue of the sky, and increase color saturation. Neutral density (ND) filters are crucial for long exposure shots, allowing you to use slower shutter speeds even in bright daylight. This technique is particularly useful for creating those silky-smooth water effects or capturing motion in clouds.
Tripods and stabilization equipment for Low-Light beach scenes
Stability is crucial for sharp images, especially in low-light conditions or when using slow shutter speeds. A sturdy tripod is essential for sunrise, sunset, and long exposure photography. Look for tripods with features like sand/salt-water resistant materials and spiked feet for better stability on soft sand. For added versatility, consider a travel-friendly carbon fiber tripod that’s lightweight yet stable enough for windy beach conditions.
Post-processing techniques for enhancing beach photographs
Post-processing is where you can truly bring your beach photos to life, enhancing the natural beauty of the scene and correcting any technical imperfections. With the right techniques, you can transform good shots into stunning images that capture the essence of your coastal experience.
Color grading to accentuate golden hour beach tones
The golden hour provides some of the most beautiful light for beach photography, but sometimes the camera doesn’t quite capture the warmth and vibrancy you remember. Color grading can help you enhance these tones, bringing out the rich golds, oranges, and pinks of sunrise or sunset. In your editing software, adjust the white balance to add warmth, and use the HSL (Hue, Saturation, Luminance) sliders to fine-tune specific colors. Be careful not to oversaturate; the goal is to enhance the natural beauty, not create an unrealistic scene.
Exposure blending for high contrast coastal scenes
Beach scenes often present high contrast situations, with bright skies and darker foregrounds. Exposure blending allows you to combine multiple exposures of the same scene to capture detail in both highlights and shadows. This technique is particularly useful for sunrise or sunset shots where the sky is much brighter than the landscape. Using layer masks in Photoshop or HDR software, you can seamlessly blend exposures to create a balanced image that more closely resembles what the human eye sees.
Noise reduction strategies for Low-Light beach shots
Low-light situations, such as blue hour or night photography at the beach, often require higher ISO settings, which can introduce noise into your images. Effective noise reduction is crucial for maintaining image quality. Most editing software offers noise reduction tools, but it’s important to strike a balance between reducing noise and preserving detail. Apply noise reduction selectively to areas of uniform color or tone, and use masking to protect areas with fine detail. Remember, some grain can add character to a night beach scene, so don’t overdo the noise reduction.
Post-processing is an art form in itself. Develop your own style, but always aim to enhance rather than fundamentally alter the natural beauty of your beach scenes.
Capturing unique beach moments: from dawn to dusk
The beach offers a constantly changing canvas throughout the day, each time period presenting unique opportunities for stunning photography. By understanding how to work with the light and conditions at different times, you can capture a diverse portfolio of coastal images.
Sunrise photography at bondi beach, australia
Bondi Beach at sunrise offers a spectacular display of colors and light. Arrive well before the sun breaks the horizon to capture the pre-dawn blue hour. As the sun rises, focus on the interplay of light on the waves and the golden glow on the famous Icebergs pool. Use a graduated neutral density filter to balance the bright sky with the darker foreground, and experiment with long exposures to smooth out the ocean surface.
Midday light management at copacabana, rio de janeiro
The harsh midday sun at Copacabana Beach presents challenges, but also opportunities for dramatic shots. Use the intense light to your advantage by focusing on the vibrant colors of beach umbrellas and the contrast between light and shadow. For portraits, seek out areas of open shade or use a reflector to soften the harsh shadows. The geometric patterns of the iconic Copacabana sidewalk can create interesting compositions when shot from above, especially when incorporating beachgoers’ shadows.
Sunset silhouettes at railay beach, thailand
Railay Beach’s dramatic limestone cliffs provide a perfect backdrop for sunset silhouette photography. Position your subjects or points of interest against the setting sun to create striking shapes against the colorful sky. Expose for the sky to ensure rich colors and deep, defined silhouettes. Don’t forget to capture the moments just after the sun dips below the horizon, when the sky often displays its most vibrant colors.
Long exposure night photography at venice beach, california
Venice Beach at night offers a unique blend of natural and artificial light sources, perfect for creative long exposure photography. Use the lights from the pier and nearby buildings to create light trails and reflections on the water. A sturdy tripod is essential for these shots. Experiment with exposures ranging from 30 seconds to several minutes to capture the movement of waves and clouds. The iconic Venice sign and skate park can serve as interesting focal points in your nighttime compositions.
By mastering these techniques and adapting to the unique characteristics of different beach locations and times of day, you’ll be well-equipped to capture truly unforgettable coastal photographs. Remember, patience and practice are key; the perfect shot often comes after many attempts and careful observation of your environment. Keep exploring, experimenting, and pushing your creative boundaries to develop your unique style in beach photography.